Access Point using DD-WRT (updated 20171224)
WAP :
Per:
https://www.youtube.com/watch?v=oenmXhN9sqA
and
https://www.dd-wrt.com/wiki/index.php/Wireless_Access_Point
Primary Router:
SSID Do###
Channel: 11
Range: 192.168.1.3 thru 192.168.1.200
SSID Doyle5G
Channel: 157
Range: 192.168.1.3 thru 192.168.1.200
Secondary Router:
1 192.168.1.2 DoyleRepeater 58:6D:8F:D9:##:##
Config:


Then disable ‘dem services
Bridge Repeater using DD-WRT
Save the file to your
desktop or a location readily accessible. NOTE: The firmware above is the only
firmware known to work on the Linksys E1500! Do not download any DDWRT
firmware or the latest version from the main site. Using any other BIN
file so will probably “brick” your router.
[step 2] Disable your
computers wifi adapter and manually set the IP address on its Ethernet adapter
to 192.168.1.9.
[step 3] Perform a
30/30/30
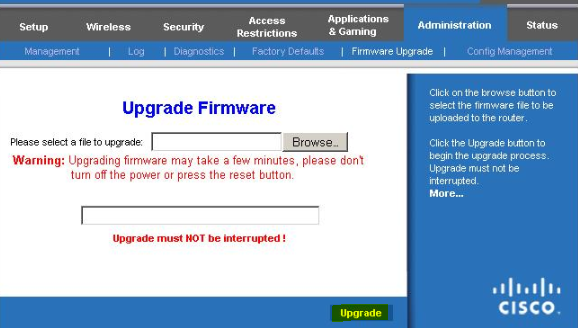
- [step 4] Power on the[step 5] Open a web browser to http://192.168.1.1/.admin: admin[step 6] Once logged into your router, click the Administration tab and then clickFirmware Upgrade. Hit Browse and navigate to the BIN file downloaded in [step 1]. Then click Upgrade and wait 5 minutes. IMPORTANT: The screen may say that theupgrade completed before 5 minutes are up, but please continue waiting until 5 minutes are up.
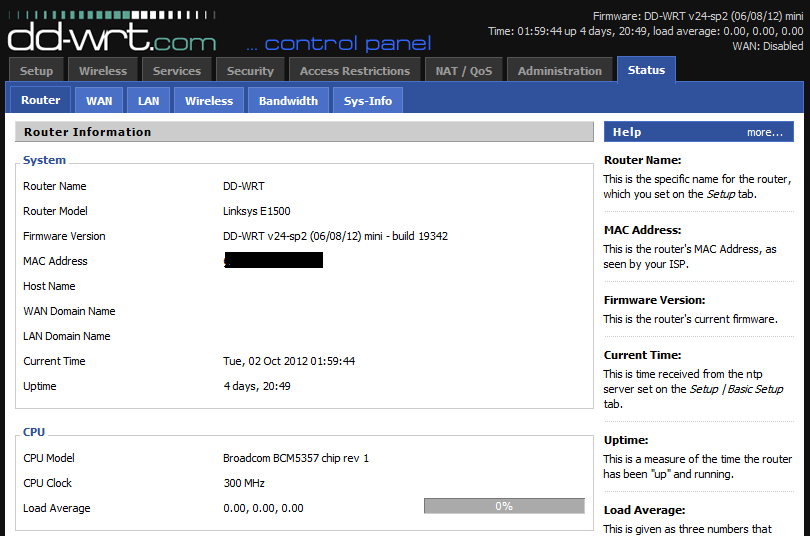
 [step 6] Once 5 minutes are up, power cycle the router by unplugging the power cable, waiting 10 seconds, then plugging it back in and waiting 2 minutes to let the router fully boot.[step 7] Perform another 30/30/30 reset on the Linksys E1500 and then wait 3 minutes after releasing the reset button.[step 8] Access the router at http://192.168.1.1/. You should see the DD-WRT splash page now if everything has worked successfully. If you don’t see this page, unplug the power and wait 10 seconds, plug power back in and wait for 2 minutes then try accessing the router again.
 Now that you’ve successfully flashed your Linksys router with the DD-WRT firmware, let’s get started with how to get it configured as a Repeater Bridge:[step 1] Note down the settings of your current wifi network. My wifi settings (for the purposes of this tutorial) are:
- Wireless Network SSID: FatCat
- Wireless Security Mode: WPA2 Personal
- WPA Algorithms: AES
- WPA Shared Key: is_Aw3some
- DHCP IP range: 192.168.1.2-192.168.1.100
- DHCPsubnet: 255.255.255.0
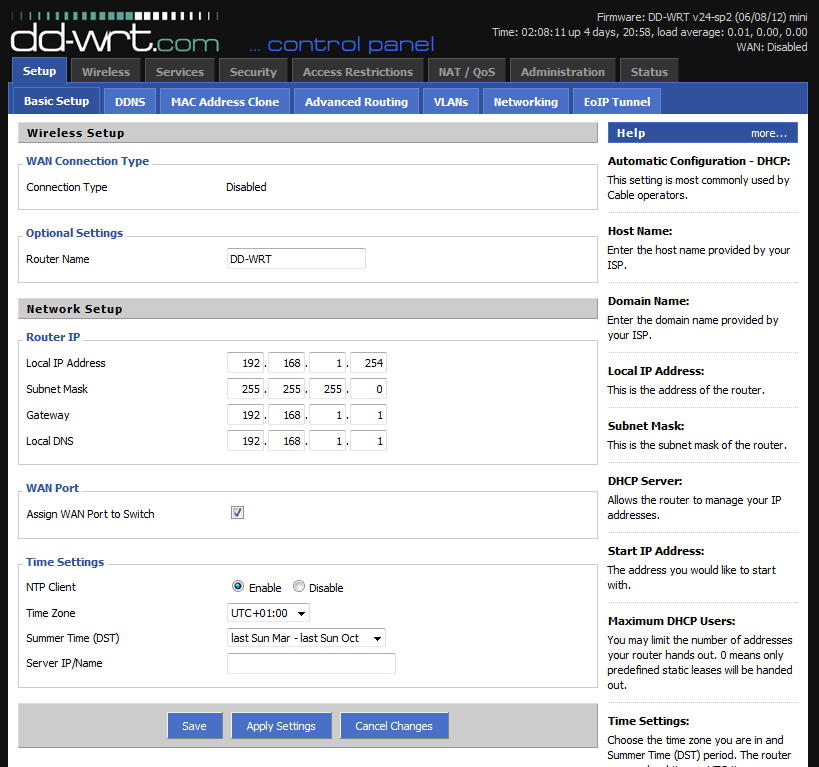
- Router IP: 192.168.1.1[step 2] On your new DD-WRT enabled Linksys device, click Setup->Basic Setup and change the IP address information to be a valid static IP outside the current wifi network’s DHCP block. I use the following on my repeater bridge:
- NOTE: Don’t worry about the connection type, it’ll change to disabled once we change the wireless mode to repeater bridge.
- IP address: 192.168.1.254
- Subnet mask: 255.255.255.0
- Gateway: 192.168.1.1 (verizon router)
- Local DNS: 192.168.1.1 (verizon router)
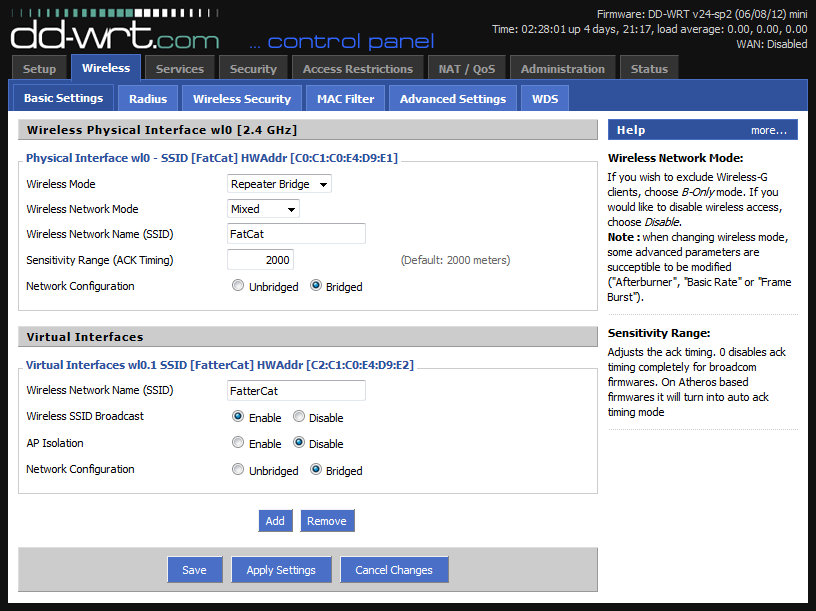
 Now click Save and then Apply Settings. Your router will reboot, so wait 30 seconds.[step 3] Access your DD-WRT device at the new IP address by navigating tohttp://192.168.1.254/.[step 4] Now click Wireless->Basic Settings and fill in the following data:Wireless Physical Interface wlo:
- Wireless Mode: Repeater BridgeThen click Save. Notice how the options on the screen change based on the mode your router is in. Now set the rest of the options on this page:
- Your current wifi network’s SSID (recorded in [step 1]): FatCat is my network’s SSID.
- Your current wifi network’s mode: Mixed is probably your best bet.
- Sensitivity range: 2000
- Network Configuration: BridgeVirtual Interfaces – Add 1 virtual interface and give it a slightly different SSID (I selected FatterCat). NOTE: You’ll be connecting to this slightly different wifi network when your primary wifi network is out of range.
- Wireless SSID Broadcast: Broadcast
- AP Isolation: Disable
- Network Configuration: BridgedClick Save.
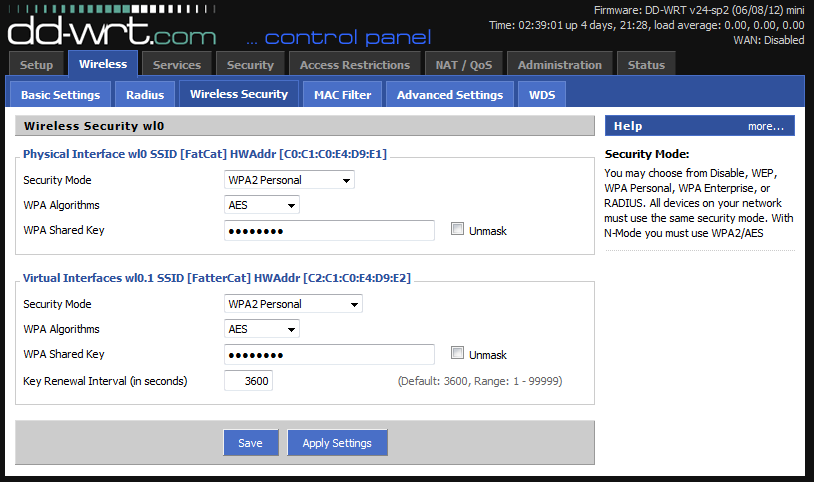
 [step 5] Click Wireless->Wireless Security. Enter the wireless security settings that match your existing wifi network (recorded in [step 1]).Physical Interface wl0
- Security Mode: WPA2 Personal
- WPA Algorithms: AES
- WPA Shared Key: is_Aw3someVirtual Interfaces wl0.1
- Security Mode: WPA2 Personal
- WPA Algorithms: AES
- WPA Shared Key: is_Aw3some
- Key Renewal Interval (in seconds): 3600
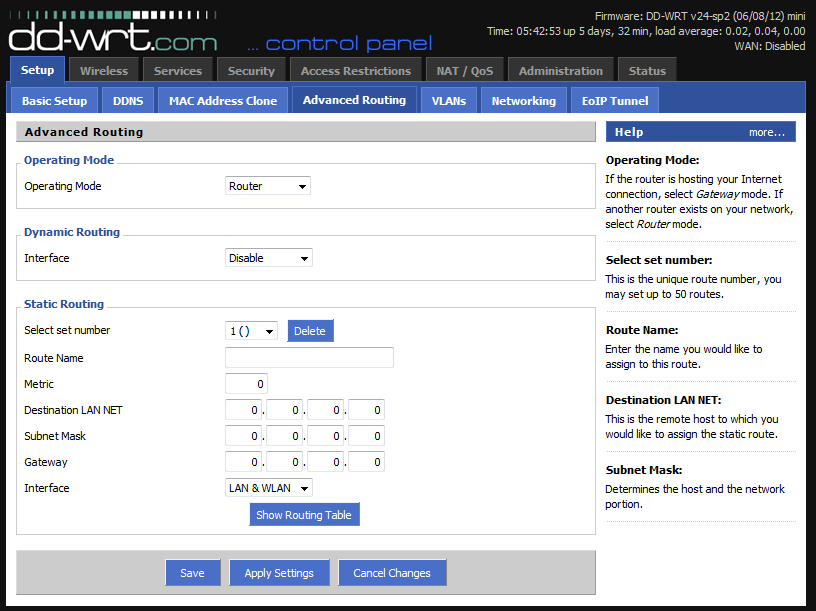
 Click Save.[step 6] Click Setup->Advanced Routing and set the Operating Mode to Router.
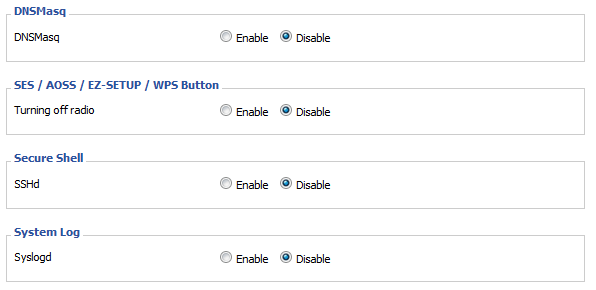
 Click Save.[step 7] Click Services->Services and set DNSmasq to Disabled.
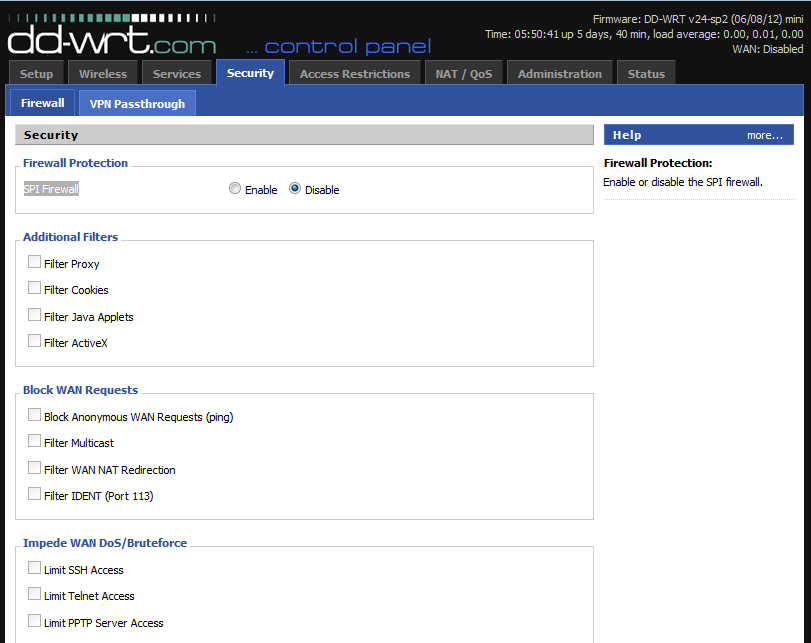
 ClickSave.[step 8] Click Security->Firewall and uncheck all boxes first then click Save. Then set the SPI Firewall to Disabled and click Save again.
 [step 9] Phew, now click Apply Settings and cross your fingers. Your router will reboot, so give it a couple of minutes and then try connecting a test device to your slightly modified wifi network (the one you created in [step 4]) and see if you can access the internet.If you’re having trouble or it’s not working, try doing a 30/30/30 reset and try the instructions from the top or visit the DD-WRT tutorial here.If everything is configured properly, your new DD-WRT should always have a solid connection on the wl0 device to your primary wifi router and any devices connected to it should be listed on the wl0.1 virtual device as shown in the wireless status window below:
 [step 10] If everything is working, you can now unplug your DD-WRT router from power and plug it back into a spot that’ll get you better overall wifi coverage.

C) Some common troubleshooting issues
THEN............. Extras..
Wireless advanced -> TX Power. 150 or LOWER to 40
Recommended Settings:
NG- Mixed
N-Only
WPA2-AES
40MHz - Lower
On the bridge device:
N- Only
WPA2-AES
Disable Cron
Disable DNSMasq
Disable WAN Traffic (services traffic counter)
- ENABLED
NG- Mixed
N-Only
WPA2-AES
40MHz - Lower
On the bridge device:
N- Only
WPA2-AES
Disable Cron
Disable DNSMasq
Disable WAN Traffic (services traffic counter)
- ENABLED
OR
Disable WAN
Frame Burst will give
about a 10-20% boost with 2 or less clients. Once you have more 2 clients I
would disable Frame Burst.
Afterburner I never seen a boost, I would skip this one.
Afterburner I never seen a boost, I would skip this one.
OR
Disable
Wireless -> Advanced Settings ->
Afterburner
Frameburst
on both routers if enabled. And also look for similar settings on your client.
Also doublecheck link quality between client -> bridge and bridge -> router.
Wireless -> Advanced Settings ->
Afterburner
Frameburst
on both routers if enabled. And also look for similar settings on your client.
Also doublecheck link quality between client -> bridge and bridge -> router.
And
Admin Management Disable
Cron